Search Bread + Butter

Thursday, December 22, 2011

A little gift from me to you!


Hello my dear B+B readers...

Just dropping in to say a quick hello. I'm still alive and doing well. I've just been busier with my projects than usual, so I haven't been able to spend as much time in the kitchen as I would like.  But I'd like to share with you something that's near and dear to me. As most of you know I make movies for a living aside from working on various productions on the tele, I am a filmmaker by trade. Some of you may remember by posting about my recent project ...here... Well here's your chance to see that project in its entirety. I present to you all my latest short film, By The Water's Edge. If you've got 11-minutes to spare have a look. You can watch it below. Or on its vimeo page ...here...

Synopsis:
By The Water's Edge takes a simple look at the human aspect of war. April 1942 (WWII), an American soldier trying to escape the enemy, encounters a young Filipino boy and his mother in Japanese-occupied Philippines. A brief encounter of kindness in a time of uncertainty.

I'm currently prepping for my next film set to shoot in January and it'll be something completely different from this previous one. I'm really excited to share it with you all soon. So for now I wish you all the very best during this holiday and in the coming new year. Happy viewing!!! Enjoy!!!!

MERRY CHRISTMAS, HAPPY HOLIDAYS
AND A PROSPEROUS NEW YEAR!!!!!


Saturday, December 3, 2011

Cheesecake


Nothing beats a good cheesecake. This is what I decided to make this year the finale of the Thanksgiving meal. I told you I made sure that I wasn't going to spend too much time in the kitchen. I felt like relaxing this year and I made sure of that. Besides, cooking a meal that could serve 10 people when only 2 will be eat didn't seem to make much sense. But I ma happy with the way these turned out. I made on full pie with two mini cheesecakes with a cheerio crust.

I had realized that I made more filling than I had anticipated and need to find some way to use it all up. Luckily, honey nut cheerios can be a nice substitute to the graham cracker. Still has the nice sweet crust crunch. You should try it. I think I'll make myself a new batch this weekend.


Makes 2 full  or 4 mini cheesecakes


Cheesecake

2 Pre-Made Graham Cracker Pie Crust (See below for homemade crust)
24 oz cream cheese
12 Tbsp condensed milk
3 eggs
3 tsp vanilla extract


Preheat your oven 350˚F

Combine the cream cheese and vanilla extract. Eat in each egg, one at a time. Then add in the  condensed milk. Mix thoroughly.

Take your pie crusts and divide the mixture evenly. Bake in the oven for 35-40 minutes. The center should be slightly loose.

Let it cool completely then place in the fridge for at least an hour. This may be done in advance.


Homemade Graham Cracker or Cheerio Crust

4 c Honey Nut Cheerios or 1 box Graham Crackers
1/2 c melter unsalted butter
Pie tins

Preheat your oven to 350˚F.

Crush the cheerios or graham crackers until almost a powder consistency. It is fine if there is still little pebble pieces in tact. You may use a food processor for this.

Place the now crushed cheerios or graham cracker in a bowl and mix in the melted butter. Combine thoroughly until clumpy. Divide the mixture into two pie tins and mold into crust shape and bake for 15 minutes.

When done, remove from the oven and let it fully cool before adding your cheesecake mixture.

Wednesday, November 30, 2011

Mashed Sweet Potato


My second cooked dish from my "not going to make it difficult" Thanksgiving meal.  Apologies as the photos don't do this dish justice. A trick I've learn over the summer to make mashed potatoes (and similar dishes) is to whip air into it. It gives it that fluffy consistency. So handing a hand mixer really comes in handy. I use evaporated milk instead of the usual milk or cream. It still gave it a nice consistency. Of course some good ol' butter. Luckily, I have an old trusty hand mixer, so combining everything and adding air to make it deliciously fluffy.  Mix it for several minutes, not forgetting to season and some salt and pepper. As much as i love the original mashed potato, this is a great alternative. Add some gravy on top, which is totally optional. Yet the taste of the sweet potato a lone is enough to satisfy.

serve 2-4


Mashed Sweet Potato

2 extra large sweet potato
6 Tbsp unsalted butter (room temp)
5 oz evaporated milk
4 Tbsp sour cream (optional)
salt
pepper

Peel the sweet potatoes and boil them in a pot of water until the potatoes are cook to fork tender. If the sweet potatoes are large, you may cut them in the halve or quarters for faster cooking time.

Using a fork or a masher, mash the potatoes thoroughly. (small bit are okay.)

Using a hand mixer, on a low setting, mix in the evaporated milk until fully incorporated. The cut the butter into pieces and also incorporate them slowly. Season with some salt and pepper. Mix for roughly 5 minutes be sure to scrape the sides of the bowl until a slightly fluffy consistency.

Serve warm.

Monday, November 28, 2011

Roasted Duck


I hope you all in the United States had a fabulous Thanksgiving holiday. I sure did. Plus, it's a much needed break from all the freeway traffic of life. I made sure that this year I kept it simple. I didn't want to overwork myself too much in the kitchen. So I opted to make three dishes scrumptious dishes. First is the deliciously scrumptious duck. I'm cooking for a miniscule crowd, so roasting a big turkey wasn't much of an option. Plus, I don't really want to be eating a ton of leftovers after anyways. Th roasting time is typical of any bird. It's sort of a constant babysitting to baste and make sure it's cooking right. But usually it's worth it.

The two pics blow don't do this duck justice. But the end result is a juicy bird perfect for 2-4 people.


Roasted Duck

1 5 lbs duck
6 springs of fresh thyme
6 sprigs of fresh rosemary
5 leaves of sage
salt
pepper
1/4 c unsalted butter (Room Temp)
1/2 small sweet onion
4 Large Garlic cloves.
1 large carrot
1 red bell pepper

 
Finely chop the 3 sprigs of thyme, 3 springs of rosemary, sage, 1 garlic cloves and combine with the butter.

Cube chop the bell pepper, carrot and half the sweet onion and place it into the roasting pan with 2 whole garlic cloves.

Prep the duck. Remove the gibblets. Wash the duck with running cold tap water, inside and out. Pat it dry with a paper towel. Cut out the excess fat from the neck and opening.

Season the duck all over with salt and pepper including the cavity.

Stuff the onion, a garlic clove and bundled herbs into the cavity of the duck. Then spread the herb butter mixture all over and in between the skin and meet especially in the breast of the duck.

Tuck the tip of the wings into the bird to prevent it from burning. Using butchers twine, tie the legs together. 

In the roasting pan, spread the onion, carrot and bell pepper at the bottom. Place the duck on top.

Preheat your oven to 450˚F. Roasted the duck uncovered for 15-20 minutes. Then baste with the melted butter and dripping from the pan. Lower the heat to 350˚F and baste every 10 minutes for 50 minutes. Overall cooking time roughly 1 hour 30 minutes. The leg should be at a temo of 180˚F and the breast at a 170˚F.

Let the duck sit for 5-10 minutes to let the juices redistribute throughout the bird.


Gravy

Take the drippings from the pan. Using a fat separator, take the main juices of the duck and blend it with 1 Tbsp of all purpose flour until slightly thickened.

Monday, November 14, 2011

Production Eats No. 49

I know, I know. I've been M.I.A. these last couple weeks. But today I'm popping up from my little cave with a brief production eats. The set I was on wasn't for a television show or a movie, it was a commercial. A Japanese beer commercial, in fact. So who knows, if I'll ever see that commercial anywhere. It was a multilingual set, which was pretty interesting. And it wasn't just Japanese and English being spoken all around.


Top clockwise: Salad (yummy greens), mashed potatoes, corn, barbecued chicken, dinner roll.

I was a bit surprised by the big portion sized piece of chicken they had served up. It may not seem like it in the picture, but it was pretty big. I will admit that this meal wasn't quite as satisfying as the previous production eats. Maybe it was a lack of seasoning. The chicken thigh was cooked well. Others at my table who had gotten the breast portion complained that it was a bit on the dry side. Good thing I didn't pick that. Eh...oh well. Not all meals can be cooked to perfection.


Dessert: A piece of carrot cake and pineapple.

Maybe it's just me, but why is it that dessert tends to come out better than the actual main entree. There was also come chocolate cake, but it looked like it would give me a nice sugar high. So I opted for the slightly "healthier" alternative and went for the carrot cake.

On to the next!

Friday, October 28, 2011

Coffee from Peet


I had gotten a nice package few weeks ago. I wasn't expecting anything. Oddly enough, I was actually home to receive it. Don't you ever feel like it's Christmas every time you get a package at the door. -- Yeah...me,too. -- Well, this package was from the generous folks at Peet's Coffee. This was in part of being a participant of the Tastemaker program from Foodbuzz.


Peet's coffee. you know it's like this really cool place o get some really tasty coffee. Inside the box were samples of their Cafe Solano and Cafe Domingo coffee grounds. It came with a nice tumbler and several $2 off coupons, which I can give to my coffee loving friends. I know for sure that I'll make use of the tumbler especially when I'm working on set. Coffee is your best friend on set especially with the long hours.

The Cafe Domingo is a blend of Central and South American coffees. The Cafe Solano is of African, Indo-Pacific, and South American coffees.


Now I'll be honest, I'm no coffee connoisseur. Sometimes I don't know the difference between the different beans and grounds and the thousands of varieties that are found out there. They all kind of look the same to me. There's too many to keep track of, really. But I do like a good cup or two or three or four -- depending on the type of day it is, but suffice to say, I like a good cup. I like to have my coffee (with a little milk or cream) and have it with a nice warm pandesal with some butter or nutella. It's all about simplicity for me.

If I go out to eat for breakfast or brunch, I usually order a coffee. It would actually be a rare moment when I'd make it at home. Maybe because I'm lazy? Anyway, I did give these a try. And I'd have to say that its got a good taste to it. Compared to some of the generic brands out there. I did give some to a couple of good friends of mine who LOVE coffee. And they, too, enjoyed the taste. Maybe I've converted them to drink the good kinds of coffee...? Only one can tell. The quality in taste is definitely higher than several brand found out there. The aroma of it is nice, too.


Another way I like to have my coffee is when I do my writing. For some who may not know, I am a filmmaker by trade. I'm a writer, director and producer. I'm constantly typing away on the keyboard conjouring up stories --  that I'm optimistic will one day see the light of day and not just sit around collecting dust. :) There are always two things next to me when I write. My trusty notebook full of ideas and a cup of coffee. They really do go hand in hand. 

How do you drink your coffee? Or how what do you pair your coffee with?

Wednesday, October 19, 2011

Baked Herb Hash Browns


I think I'd have to consider the potato as one of my favorite vegetables. It's carbolicious! I was fortunate to receive a couple coupons to get myself a couple packages of Simply Potatoes Shredded Hash Browns courtesy of the Tastemaker programs from Foodbuzz. It took me a while to find them as I had thought they would be in the freezer section. Then I reread the coupon and it stated that it can be found in the refrigerator section. It would have saved me the 10 minutes I spent walking up and down the freezer section. That was my fault.


Anyway...when I did finally find them, I got a couple bags. These are real potatos already shredded. So it takes the work out of having to peel and shred them yourself.


I made a simple hash with them. I was tempted to make casserole, but I didn't have enough of the required ingredients to make it. So I opted for the good ol' fashioned hashed browns. Besides, I wasn't really in the mood to spent a huge amount of time in the kitchen. The beauty of the recipe below is that it is baked. No need to bust out the pan and oil and have to deal with the clean up after. Baked herb hash brown is what I got with a little cheese on top. A mix of the crunchy and soft. Serve it for breakfast with a coupe of fried eggs, toast, sausage or bacon (or both, in my case). You can even have it for dinner.

Simply Potatoes does have a variety of products. Hopefully, I'll get to try more of them.


Herbed Hash Brown

1 package Simply Potato Shredded Hash Browns
1 Tbsp dry basil
1 Tbsp dry thyme
1 Tbsp dry oregano
1 Tbsp garlic powder
1 tsp paprika
1 tsp salt
1 c shredded cheddar
unsalted butter


Preheat your oven to 400˚F

In a bowl, combine the shredded potato, basil, thyme, oregano, garlic powder and paprika. Mix thoroughly to combine.

Coat a baking sheet with the unsalted butter. (You may cover the sheet with foil for easy clean up.)

Divide the potato mixture into 8 portions and place them on the baking sheet. Gently pat them down to flatten. Make sure to space each evenly.

Bake them in the oven for 15-18 minutes. Then flip each and bake for another 15-18 minutes. Then sprinkle each with the shredded cheddar and baked for 1-minute until the cheese has melted. Remove from the oven and let it cool for 5 minutes before serving.


Monday, October 17, 2011

Juice, tea and tervis?


I know I haven't posted in while. It's been touch and go with me in the kitchen. Haven't had a chance to really dig my hands into some good ingredients. I did receive some packages during that time though. Thanks to the Tastemaker program from Foodbuzz, I got to try out this really cool tumbler.

Tervis is a brand of tumbler cups. As their description say that it's "virtually indestructible". A lifetime guarantee that it won't crack, melt, shatter, or chip. -- "Interesting?" as I said aloud.


I did drop it on my kitchen floor as I was about to pour me a drink. Totally unintentional, I promise. I just had butterfingers at the moment. No really, I did.

I'm big on iced tea. I've got no preference on flavor or variety. As long as it's some form of iced tea, I'm good to go. Since the weather here in Los Angeles has been a bite of the summery side, even when it's supposed to be fall, it was a good time to sip some cold ones and give this nifty looking tumbler a try. I will admit that the design of it is really cool. And they had the Foodbuzz Tastemaker logo on it. Neat, eh? It looks like a cup within a cup. Ooooooo...

It did keep my drink cold. Another part of the their description was that it kept hot drinks hot and cold drinks cold. The couple times I've used it, I haven't been disappointed. It does what it says. Also, there wasn't any condensation on the outer part of the glass which made for grabbing the tumbler a little easy and not having to wipe away any moisture that normally form around it leaving those rings on the table. I think that's an added plus.

I'd say give it a try if you see one. They've got a nice selection on their website


Friday, September 23, 2011

We've Got A Winner

Thanks to those who entered B + B's Girard's Dressing Giveaway. With the help of the random number generator, I diligently counted and numbered each comment, which were a good small handful. 

Our Lovely #8 is...


Woohoo!!!!! Congratulations on winning B + B's Girard's Dressing Giveaway!!! You'll be getting an email from me very soon. Hope you enjoy the delicious dressing. You'll be getting some good quality stuff. It's not just for salads, ti can also be used as a marinade. Enjoy!

Wednesday, September 21, 2011

Production Eats No. 48

It's been a while since I've done a production eats post. So here's #48. Worked the show Big Bang Theory the other day. Sitcoms are fun to work on. The day I was there was on they day when they tape in front of a live audience. Yes, some shows are still taped in front of real people. The process of filming is slightly different compared to those scripted dramas, which is cool. Anyway... on to the eats.


Pineapple slices, Grilled Chicken, Garlic Bread, Salad with some balsamic dressing

My plate looks a bit small, but it was filling. The chicken tasty. It took me a while to cut through it with the flimsy utensil I had. But I did eat it up. Added a little kick to it by putting some tapatio hot sauce. I love me a good dose of hot sauce every once in a while.


For dessert, a peanut butter cookie and a chewy brownie. I nearly forgot to take a pic of the dessert hence why the cookie looks half eaten. I get eager for dessert before the entre. Has that ever happen to you? I guess my sweet tooth always wins out in the end.


Today's your last chance to enter the little giveaway of Girard's Dressing. Head on over right now to the link below and leave a comment to be entered. Don't miss out on this, if you haven't entered already.


Lastly, to all you marathon runners out there... any advice on training? I've started training for the LA Marathon, which I will be running in 2012. It's my first ever! I've always wanted to run it for several years now, but have always backed out, wimp out, or get lazy to do it. Now I'm taking that leap and kicking myself to do it. I've always love to run, but have been so busy these last couple of months that I have to get used to it all over again. What's your process to prepare?


Monday, September 19, 2011

Give Away...

Hey B + B fans... Just a quick little reminder. If you haven't already entered the little giveaway I'm doing right now. Click the link below and leave a comment on that post to be entered. It's that simple and easy-peasy. You've only got until Wednesday the 21st to enter, so click away!! :)


Thursday, September 15, 2011

A little B+B Giveaway.

Gasp!! A giveaway!!! Yes, you read it right. The awesome folks at Girard's Dressing are kind enough to set aside a lovely sampling of 4 dressings to a lucky B + B reader. Now I rarely do giveaways, so take advantage of this opportunity as who knows when I'll be doing another one. Plus, you'll be tasting some really good quality stuff. Remember dressings and vinaigrettes aren't just for salads. You can use them to marinate chicken and meats, too. Be creative with them.

Imagine a large package arriving at your door and inside are 4 bottles from their variety of dressing. The picture shown below was from the first time I had the opportunity to try their dressing late last year. Who knows which ones you'll get.


To enter please leave a comment below with a valid email or link to your blog. Basically any way I can get into contact with you...to whoever wins. It's that simple. Deadline to enter is Wednesday, Sept 21st. So enter for your chance to win some of Girard's Dressing. Do it....now!! Spread the word!!! Good luck!!


P.S.: If you haven't already, why not become a fan and "like" my photography page on facebook. It's in need of some fans. :) I've got several new photos that I'll be posting. There you'll get to see all new releases:  http://www.facebook.com/jenniferrazonphotography Check it out!

Wednesday, September 14, 2011

PizzaChipTizers


PizzaChipTizers = Pizza + Tortilla Chips + Appetizers

I couldn't resist. This is perfect for those game day snacks. Finger foods, so that you won't have to take your eyes off from the screen. It's basically a pizza in a portable handy form. Luckily as being a part of Foodbuzz Tastemaker Program, I had received a gift card courtesy of Sargento cheese. CHEEEEEESE!!!!!! I think I've mentioned I love cheese. I eat tons of it, hypothetically speaking. And it's a good thing that I've already been a loyal consumer of Sargento for quite some time now. Unless I'm on a major budget and have to go with a cheaper brand. 


I enjoy their artisan blends as they have the natural cheese taste. Now I'm not much of a cheese connoisseur, but I know good tasting when I eat it and the quality of Sargento's Artisan Blends shows it. I bought several. From the provolone sandwich slices, mozzarella, shredded parmesan (perfect for pizza and pasta). I regularly grab me a 2-pounds bag of their 4-cheese Mexican Blend when I go to the market, which is perfect for tacos.

A couple of days ago, I had a bright idea to make some kind of appetizer. I had some blue corn tortilla chips, but nothing to dip them in. Then for some reason, I had a craving for pizza. I know totally random cravings. As I mentioned above, the combination of the two I believe is a match made in heaven.

I used Sargento's Mozzarella and Provalone Artisan Blend. Pepperoni was my topping of choice. Of course you don't have to choose pepperoni. Here's a little hint to keeping the tortilla chip from getting soggy. I had pre-baked the pepperoni pieces in the oven to help crisp them up and to remove the fatty oils that are in them. That way as the cheese melts, the oils won't seep through and absorb into the chip. Neat, eh? It's been something I've done for many years when baking pizza and the extra crunch from the pepperoni is a nice touch.

Special thanks for Sargento and Foodbuzz for the gift card, so I stocked up on my cheese. :)


PizzaChipTizers

Blue Corn Tortilla Chips
1-2 (2 cup bag) Sargento Mozzarella and Provalone Artisan mix
Pepperoni


Preheat your oven to 350˚F. Line a baking sheet with foil and lay pieces of pepperoni flat to cover the surface. Bake in the oven for 20-25 minutes until the pepperoni have slightly crisp.

When baked place the pepperoni pieces on a paper towel to drain out the excess oils that have cooked out of the meat.

On a clean baking sheet, lay whole pieces of tortilla chips evenly. Sprinkle generously the mozzarella and provolone cheese and place 2-3 pepperoni on top of each. Then bake in the oven for 5-10 minutes until the cheese has melted.

Let the PizzaChipTizers cool for 5 minutes before eating.


Thursday, September 8, 2011

KC Masterpiece Chicken


I'm in a chicken mood, have you noticed?

As part of the Foodbuzz Tastemaker Program, I received a sample bottle of the KC Masterpiece Buffalo Marinade. What better way to use buffalo flavored marinade than with chicken. It doesn't get any better than that right? I cooked up these tasty beauties with the White Balsamic Grilled Chicken I had posted the other day. Ya know... get a little variety into the party. Of course, being the only one who loves hot and spicy foods in the household, I ate it up. At least, as much as my stomach can take.


I just poured the marinade over some chicken (again some tenders and boneless thighs) and let it sit for roughly 30 minutes to let the meat absorb the flavor. It's that easy. Seasoned with a little salt and pepper before marinating then later onto the grilly grill or in my case ol' Georgie. I'm sure ol'' Georgie felt useful once again.

The taste is very much like having buffalo wings without having fried chicken wing part. Dip it some blue cheese dip with a side of celery and carrots, if you'd like. I had it with some delicious salad to balance it all out. Though the weather was hot that day, I didn't mind. Got myself some tasty grub in my belly.


Buffalo and Chicken

1/2 lb Chicken Tenders
1/2 lb Boneless Chicken Thai
1 c KC Masterpiece Buffalo Marinade
salt and pepper

Season both sides of the chicken with salt and pepper.

In a deep enough dish, place chicken pieces and pour over the KC Masterpiece Buffalo Marinade. Coat all sides of the raw meat and let it marinate for at least half an hour to two hours.

Prepare your grill. When your grill is ready, cook the chicken tenders both side 3-5 minutes on each side until full cooked through. For the chicken thigh, grill them for 5-7 minutes on each side until full cooked through.

Let the cooked pieces rest on a plate for 2-3 minutes to let the juices redistribute.

Tuesday, September 6, 2011

An Epicurean Expert with Chicken


I hope you all had a wonderful Labor Day weekend for those in the US. Long weekends are fun aren't they? You live it up all the days or in my case, veg out and spend time with good company. It was a good weekend excuse to take advantage of the grill before the weather starts to become cooler. I didn't get to use ol' Georgie as much this summer. I wish I did more.  But I was not going to let this weekend deter me from it. So grill I did.


A little over a week ago I received a package. The wonderful folks over at Girard's Dressing were kind enough to send me one of their Epicurean Expert Kit.  As you may remember I've had the opportunity to try out a few of their dressings before. And I enjoyed them quite a bit. You can read about them HERE. The Epicurean Expert. Kind of sounds like I'm part of a club. :-D


In the kit:
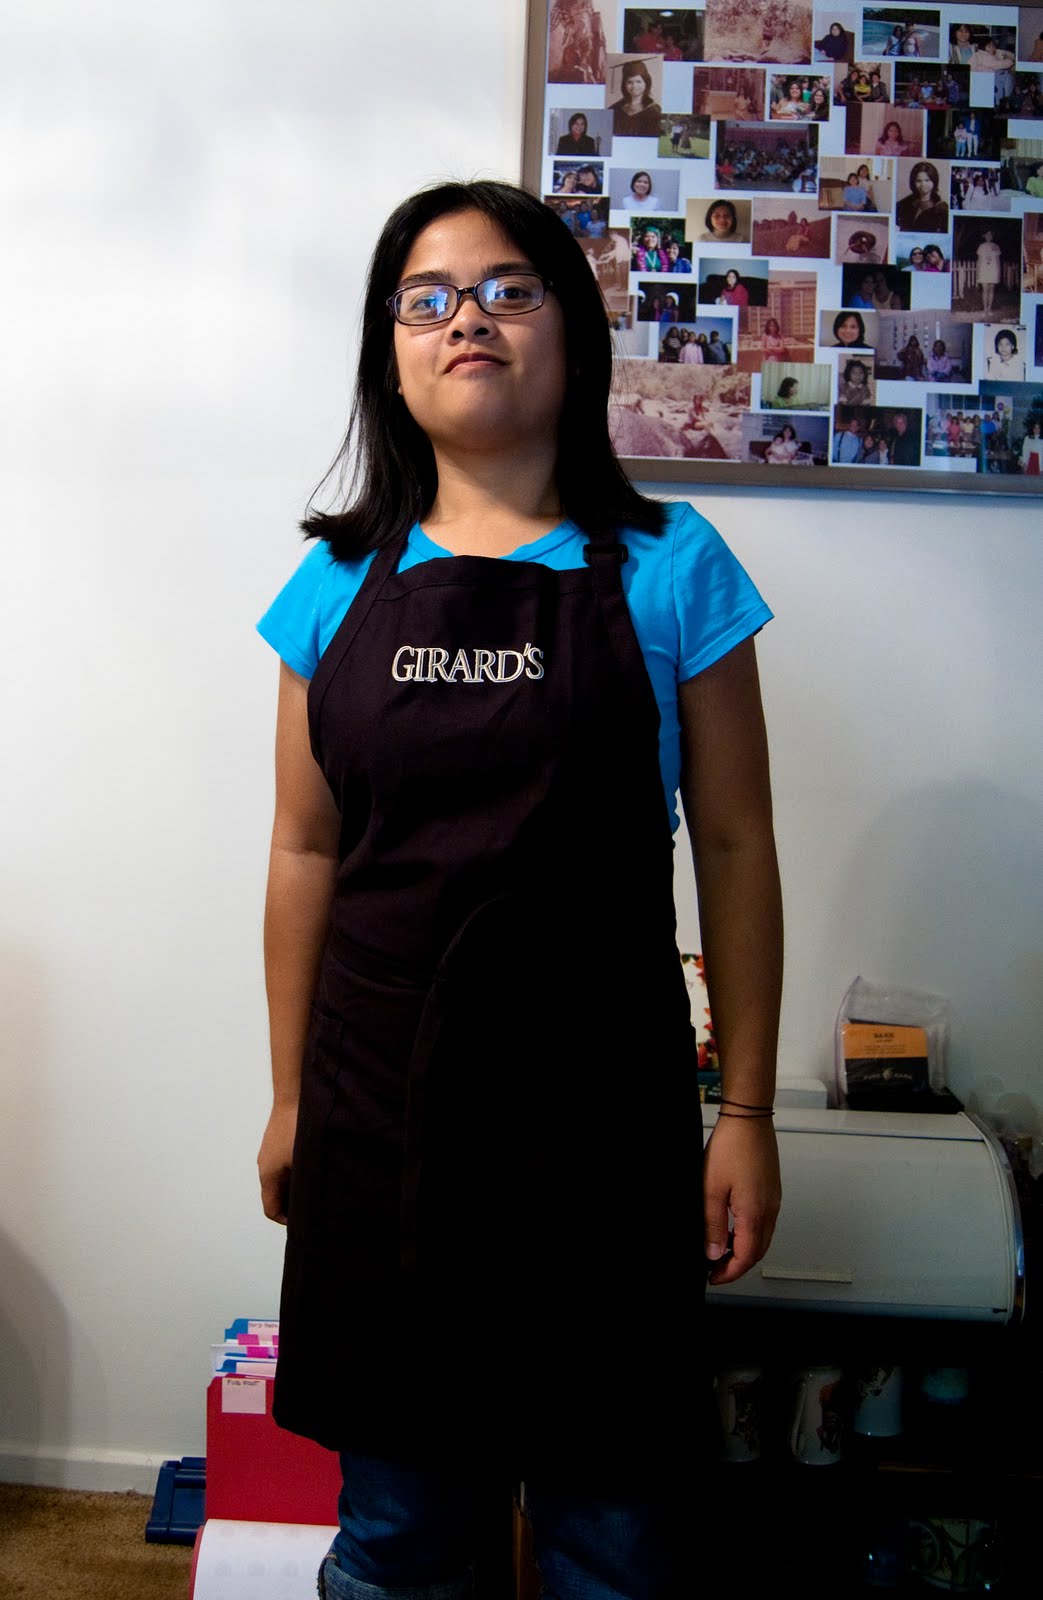
Cotton Twill Full-Length Embroidered Apron with Pockets
Eco-Friendly Bamboo Wooden Utensil Kit
100% Cotton Tote Bag
Stainless Steel Soap
Stainless Steel Recipe Card Holder
Girard's Salad dressing Recipe Booklet.

Sample dresssings:
Light Champagne
Olde Venice Italian
White Balsamic Vinaigrette
Greek Feta Vinaigrette

sporting the apron

I'm still kind of figuring out how you use the steel soap.  Didn't even know such a thing existed. I was happy to see the bamboo utensils in there because that means I don't have to use my barbecue tongs anymore to mix my salads. I'll definitely be putting to good use the recipe holder. That way I won't be ruining my recipe cards.

Since this past weekend was Labor Day in the US, it was a perfect time to crack open the dressings. I originally was going to make the recipe below earlier in the week, but my plans got thrown out of whack.  I used the White Balsamic Vinaigrette as a marinade to some chicken tenders and boneless thighs. You wouldn't necessarily think to use a vinaigrette or dressing as such, but you'd be surprised it's very useful than just coating pieces of leafy greens. It brings a nice flavor to your choice of meat without the hassle of taking a bunch of ingredients from the pantry. Just pop the bottle open, pour over and marinate.

The vinaigrette has a nice citrus hint to it and gives the chicken a lovely subtle flavor into the juices. It was delicious! Grilled to a tender and juicy consistency. I had also made a little bit of salad (romaine, avocado, orange cherry tomatoes, and bell pepper) and used the Light Champagne, which is a light version of their regular Champagne dressing. It also has a nice light flavor. It paired really well with the White Balsamic marinated chicken. Combine the two together you've got yourself a lovely chicken salad. It's definitely a method worth trying. 

Special thanks again to the folks at Girard's Salad Dressing


Disclaimer: I received these products to review for free. 


White Balsamic Grilled Chicken
1/2 lb Chicken Tenders
1/2 lb Boneless Chicken Thai
1 c Girard's White Balsamic Vinaigrette
salt and pepper

Season both sides of the chicken with salt and pepper.

In a deep enough dish, place chicken pieces and pour over the White Balsamic Vinaigrette. Coat all sides of the raw meat and let it marinate in the dressing for at least half an hour to two hours.

Prepare your grill. When your grill is ready, cook the chicken tenders both side 3-5 minutes on each side until full cooked through. For the chicken thigh, grill them for 5-8 minutes on each side until full cooked through.

Let the cooked pieces rest on a plate for 2-3 minutes to let the juices redistribute.


Thursday, August 25, 2011

Soft Pretzels


Yes, it a recipe!!! I know, I know. I have posted a recipe in seems like ages.I blame it on work. But I was determined on this particular day to bake up a little something. I had been craving pretzels for quite a while. I love pretzels. Especially those soft thick ones you find in the mall. I'd always buy either a lightly salted or a cinnamon sugar. Those were my two picks. But since I'm on a tight budget right now, I couldn't really go out and buy few of them from my local mall. The county fairs are a bit far from me, so that was out of the question.

So I searched the interweb to various recipes. What I found is that it's very similar to making bread. Which in reality it is bread, just with a little extra steps and toppings. So I mixed and matched and formulated something into my own and still reminded me of the ones found at the local malls. The result is what you see here. Slightly crunchy crust with a delicious chewy inside. I like to baste the pretzels with melted butter a second time after baking to make it mice and butter. Yum!!! Though, I need to work on my pretzel twisting skills though. I tried to do it the lift and twirl in the air move to no avail. but I did manage to make them look decent after a couple tries.

ps. Don't forget to check out my photography website and become come a fan on facebook :)


Makes 8 pretzels


Soft Pretzels

1 packet active dry yeast
1 Tbsp granulated sugar
1 c warm water 110˚F
3 c All-Purpose Flour
1 tsp salt
1 Tbsp olive oil

2 c water (110˚F)
2 Tbsp baking soda
1 Tbsp melted unsalted butter
Coarse Kosher Salt

 before baking

In a bowl dissolve the yeast in in the 1 cup warm water and add the 1 Tbsp sugar. Stir lightly to activate yeast. Then add the 1 tsp salt and slowly mix in the flour.

Once the mixture has combine in to a dough ball, liberally flour a flat surface and knead the dough for roughly 8 minutes.

In another clean bowl add the olive oil and coat bowl and the dough ball. Cover the bowl with a towel and leave it in a quiet slightly dimmed area to let the dough rise. Roughly 1 hour.

After an hour, remove the dough from the bowl and divide it into 8 pieces. Roll out each piece into a 1/2-inch thick, 18-inch rope and form it into the pretzel shape. and place them into a parchment paper-lined baking sheet. Let the pretzels rise a second time for roughly 15- minutes.

Preheat your oven to 450˚F

In a wide enough dish combine the 2 cups water with baking soda. Mix to dissolve. Once the pretzels have risen a second time, dip each pretzel in the baking soda solution for a few seconds and place it back on the baking sheet.

Baste each pretzel with the melted butter and sprinkle some of the coarse kosker salt on top.

Bake for 10-15 minutes.

To make cinnamon pretzels: do not add salt before baking. After baking baste the pretzels once more with melted butter and sprinkle liberally with cinnamon sugar.


Wednesday, August 24, 2011

Photo-Graphy

Hey B + B readers...check out my new little photography site. It's my latest endeavor into the creative world. I've pretty much been an amateur photographer for many years and more recently it's becoming more of a side job. :) As some of you who have been an avid follower of this here little blog of mine, may know that I love to do photography as well as film. You can see a tiny sampling of the photos I've taken in the little slideshow below. Portraits, events, animals, etc... Some of them you may have seen some, especially the food photos, and a ton more are never before shown to the public with various being recent. I've got tons more in my portfolio on my website, too: Jennifer Razon Photography

Take a look around view the different categories in the portfolio. Become a fan on the FaceBook page as well. (Pretty please with sugar on top.) I'll be posting some new photos on there soon and every-so-often as well from various photos shoots I'll be doing. Please stop by and check it out. Tomorrow, I've got a fun recipe to share with you all. It's a classic as well. Gasp! Yes...a recipe!!!! So come back tomorrow, too, eh?


Thursday, August 18, 2011

Birds Eye, too


So I ate up that last sample I had received from Birds Eye (which I had gotten as being a part of Foodbuzz's Tastemaker program). The samples are from the Birds Eye Chef's Favorites selection, which will be hitting store freezer sections soon. You can read my last post on the other three items I received from them as well. (here)

The last sample I ate up was the Roasted Red Potato & Green Beans. Heated it up the microwave way. Which saved me time from having to take out an pans to cook with. It was lightly sauced, which had a nice slightly creamy consistency to it. To make this a nice meal for two, I added this to some orzo pasta. The orzo mixed in really well taking on the flavor of the sauce. Sprinkle a little parmesan cheese and you've got yourself a nice little dinner for two. Jazz it up a bit and make into something semi-homemade.

Definitely gives these chef's favorites a try. I think I'd get me a couple more of those risotto. I enjoyed those quite a bit.


Blog Widget by LinkWithin
Powered By Blogger